Rebuilding Brushy Land's Front Entrance
January 2009 - November 2009
 Background
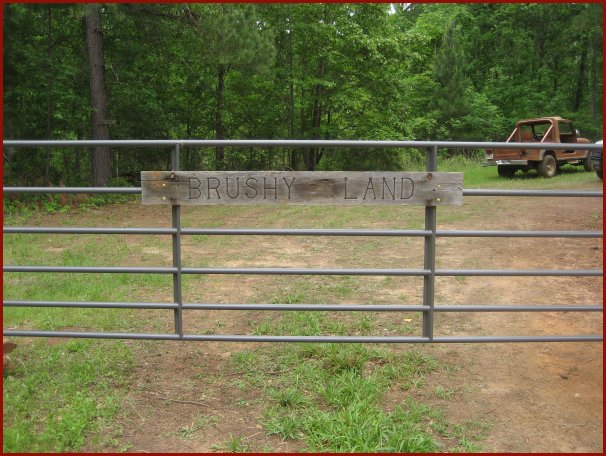
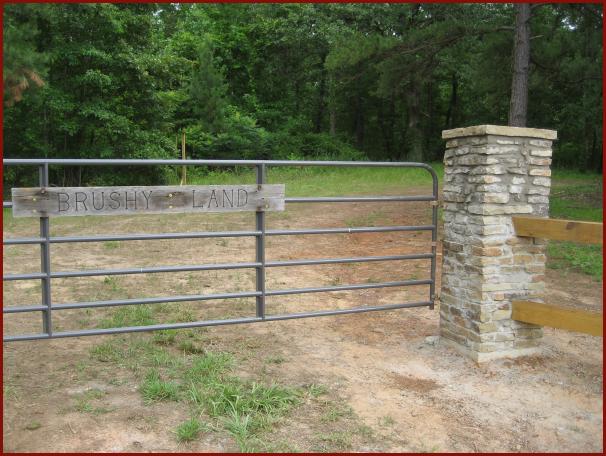
In January 2009, we began building a new front entrance for Brushy Land. The sagging barbed wire fence and worn-out
galvanized gate had served us well for 30 years, but we were ready for something different. So we decided to build
eight rock columns with a new gate in the middle. The rock columns are connected to each other via two massive
6x6 treated pine beams. This was the first rock & mortar project that either Dad or I have worked on. The new gate
itself is a fairly typical 16 foot long, metal-pole cattle gate. We weren't trying to make an overly elegant front
entrance; just something a little unique, yet still rustic. Sorta like the
"Brushyhenge" structure
that we rebuilt three years prior to this project.
Fun Facts
- The eight rock columns are 2ft by 2ft square. The two columns on each side of the gate are roughly 6 feet
3 inches tall (22 layers of rock) and the other six columns are five feet tall (18 layers of rock).
- To complete all eight columns, we created 152 layers of rock which required 608 cornerstones.
- We hand-cut (via hammer & rock chisel) all 608 cornerstones ourselves. In fact, all the work on this project
was done the old school way - with hammers, chisels, hoes, and wheelbarrows. No power tools.
- One bag of mortar was required for every one & a half layers of rock, so we mixed 101 bags of mortar
for this project using a hoe, a wheelbarrow and arm muscle.
- Each column has a square caprock on top of them. We had them specialty cut to overlap the column an inch
on each side. Each caprock weighs roughly 150 pounds.
- The new 16 foot long gate is 2 feet longer than our old galvanized metal gate.
- We did not work on this project during the hot summer months (July, August, September).
 May 3, 2008
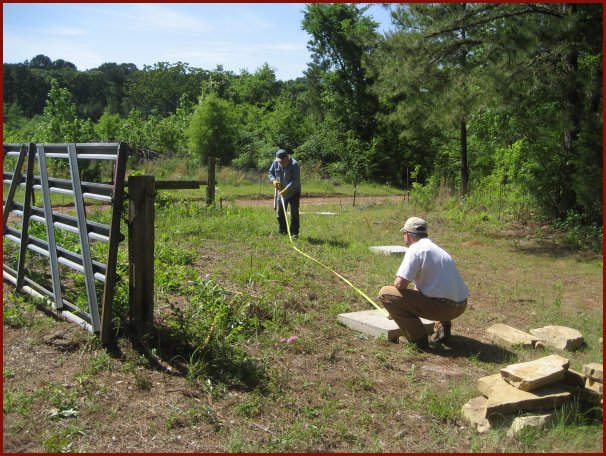
While serious work on this project didn't begin until January 2009, we began planning the new entrance nearly
a year earlier. In the above picture, Dad & David Hood figure out where the rock columns should be placed. Instead of
pouring our own foundations, we decided to use 2 foot x 2 foot steel-reinforced concrete pads as the foundations for
our rock columns. But hot weather and some plumbing issues
(see
here and
here) delayed the front entrance project eight months!
 January 24, 2009
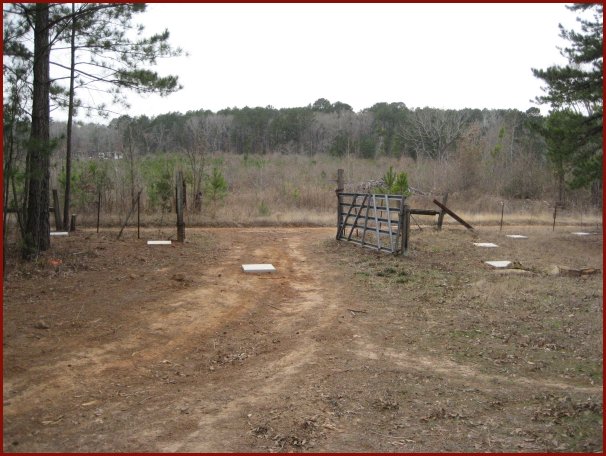
The front entrance project began in earnest in January 2009. It had been several months since we positioned
the concrete pads, so Dad & I made sure they were still level and in the correct positions.
January 24, 2009
The front entrance project began in earnest in January 2009. It had been several months since we positioned
the concrete pads, so Dad & I made sure they were still level and in the correct positions.
 January 24, 2009
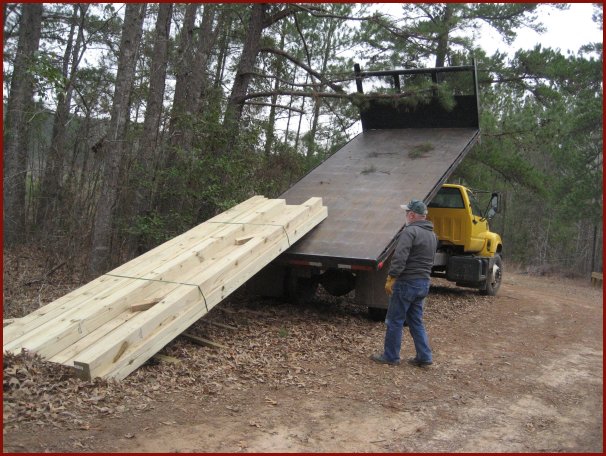
We had the 16-foot long 6x6 treated pine beams delivered from Athens Lumber. Those beams served as fence rails
running between the rock columns. Here is a video of the beams being unloaded.
January 24, 2009
We had the 16-foot long 6x6 treated pine beams delivered from Athens Lumber. Those beams served as fence rails
running between the rock columns. Here is a video of the beams being unloaded.
 February 14, 2009
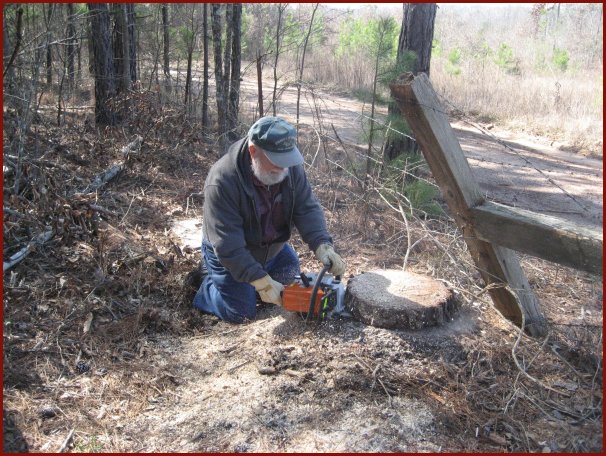
We did quite a bit of clean up work around the proposed rock-column sites. Dad is removing a stump from a
medium-sized pine tree we had to fall. He was using his new Stihl chainsaw and was very pleased with its
performance.
February 14, 2009
We did quite a bit of clean up work around the proposed rock-column sites. Dad is removing a stump from a
medium-sized pine tree we had to fall. He was using his new Stihl chainsaw and was very pleased with its
performance.
 February 21, 2009
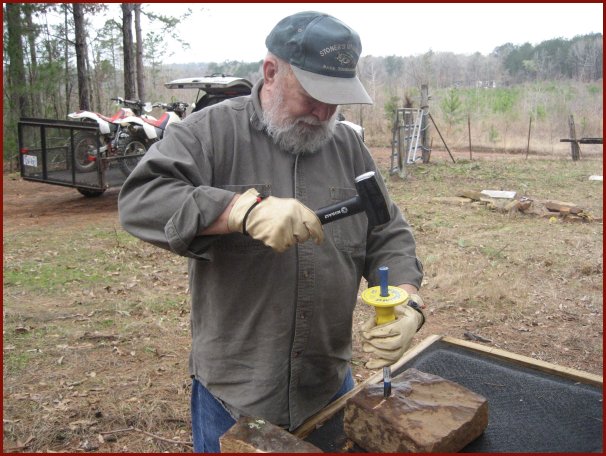
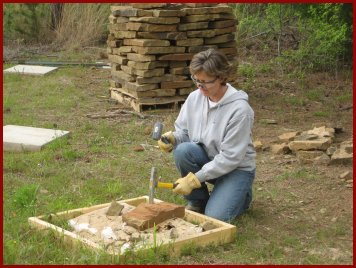
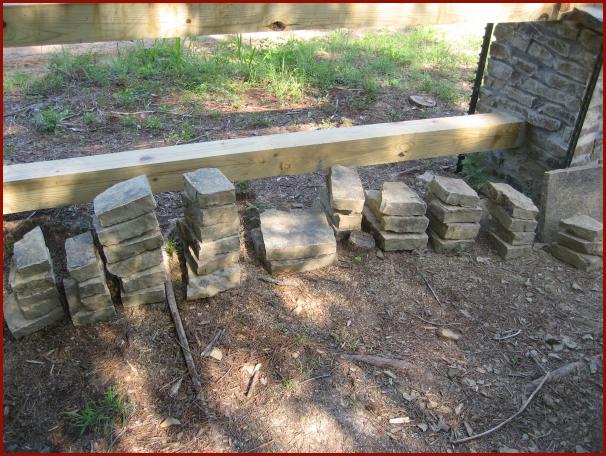
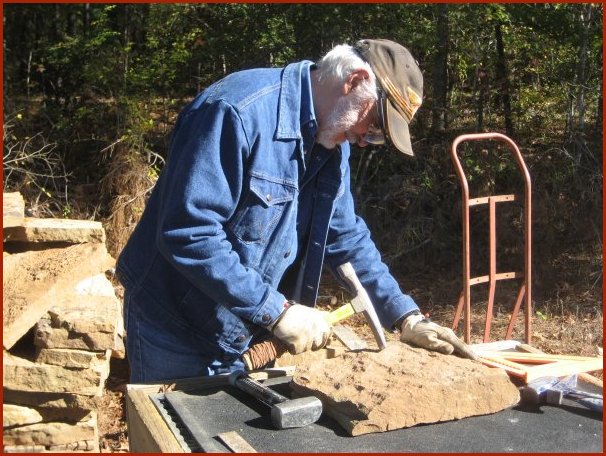
Dad & I have built many structures out of wood, but until this project neither of us had worked with rock. After
reading up on it a bit, we learned that if you score the rock on all 4 sides - using a hammer and rock chisel - it will
often break on the score line. You need rocks to do this so that you can make cornerstones - i.e. rocks with a nice
90-degree corner that will help make the corners of the columns look nice. We could have brought out a gas-powered,
diamond-tipped saw to cut the cornerstones, but those saws are very loud and very dusty. Cutting the rocks by hand,
the old-school way, felt better to us somehow - even though we had to cut some 600 of them! Notice the heavy-duty
table that Dad built to make busting rocks easier on us.
Here is a video of Dad practicing on
a sample rock that he bought in Dallas.
 February 23, 2009
Here
February 23, 2009
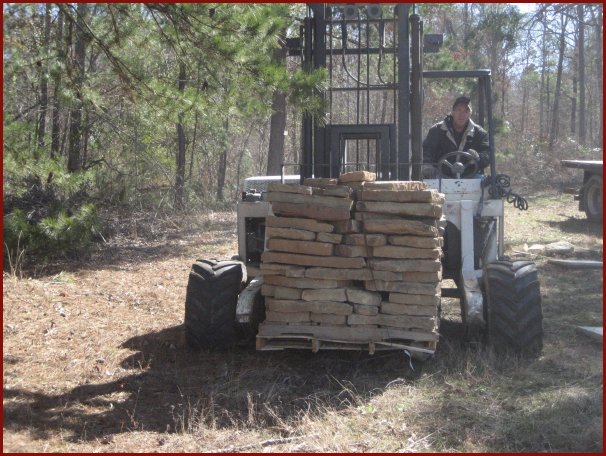
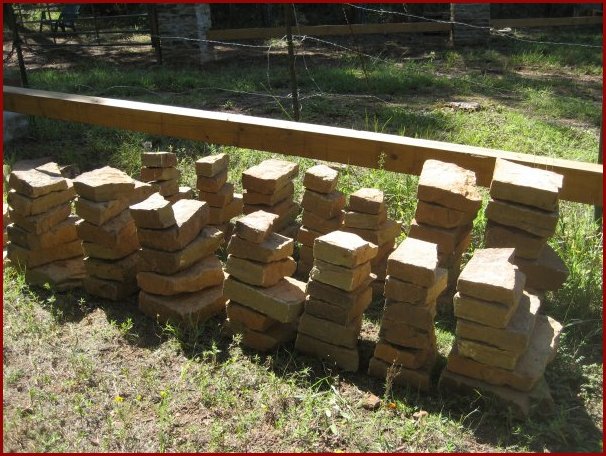
Here is a video of a guy from Clay Structures (located near Mabank, TX) unloading one of the
five pallets of rock that we bought from them. Each pallet weighed over a ton. The rocks we picked out are called
"Oklahoma Builders" and are slightly reddish-orange which resembles the iron-ore rock commonly found near our land.
 February 23, 2009
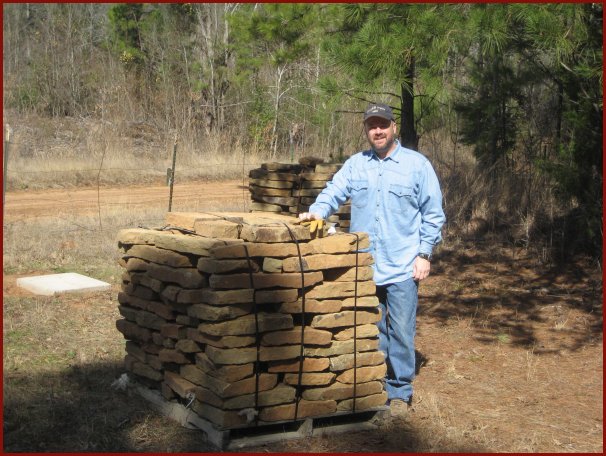
Me standing next to a pallet of freshly delivered rock. Now it's time to start building the rock columns.
February 23, 2009
Me standing next to a pallet of freshly delivered rock. Now it's time to start building the rock columns.
 February 28, 2009
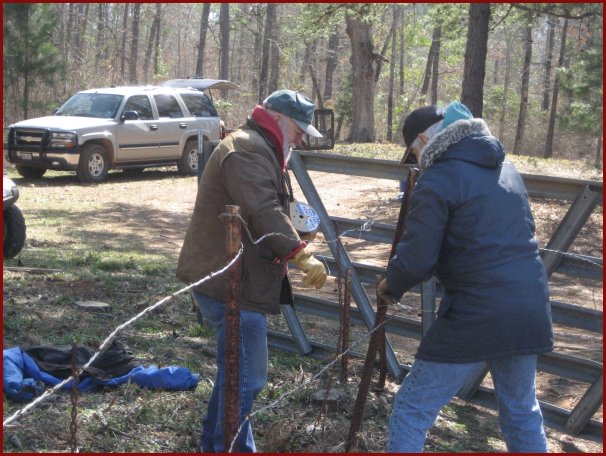
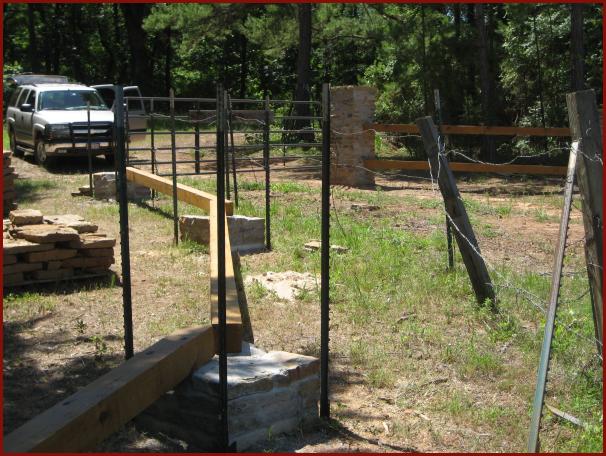
We will eventually have a rock column blocking our current entrance, so the first chore on this day was to
move our current gate over a few feet. That's Dad (brown jacket) and Chuck (blue) re-wiring part of the fence. I
ended up having to use the tractor to pull out a few of the old metal fence posts.
 February 28, 2009
It was cold and windy on this particular day.
February 28, 2009
It was cold and windy on this particular day.
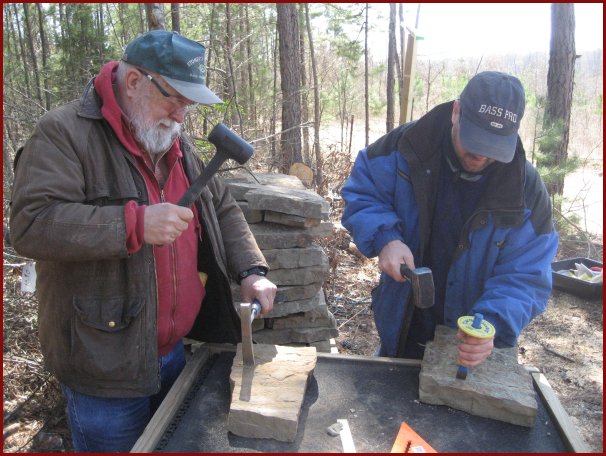 February 28, 2009 --- making cornerstones
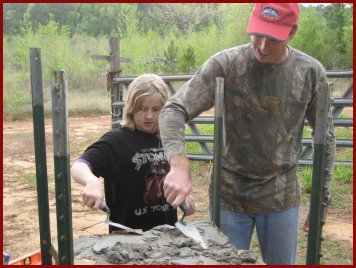
That's Dad (brown jacket) and me making cornerstones. It took some practice to get these particular rocks to cleave
correctly on our score lines. You often have to tap moderately hard up and down the score line on all 4 sides several
times before the rock would break. These rocks often have a vein of hard material running through them, causing the
rock to sometimes break along a vein instead of along the score line. But after a few weeks, we became pretty good at
scoring and breaking these rocks. It usually takes around 5 minutes of "scoring" (tapping moderately hard on the score
line) before the rock would break. Since we had to make 600 of these cornerstones, that's 50 hours of rock breaking
alone! You can often hear when a rock is about to break on the score line. The pitch of the hammer strike suddenly
drops. Amazingly, the rock is still moderately strong and will even survive being dropped - but one more light tap
on the score line will break it in two. Kinda cool.
Here is a video of Dad & Chuck working the rock.
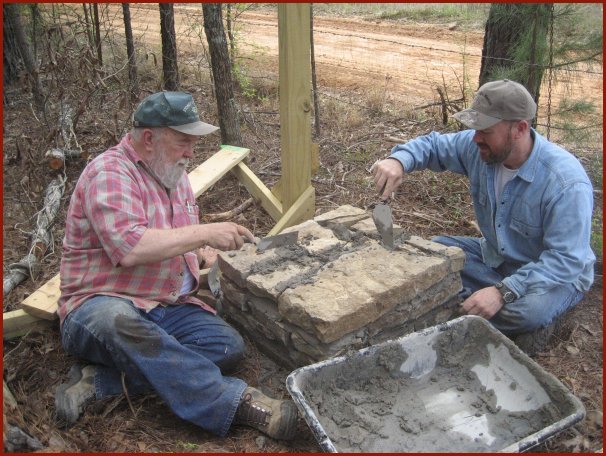
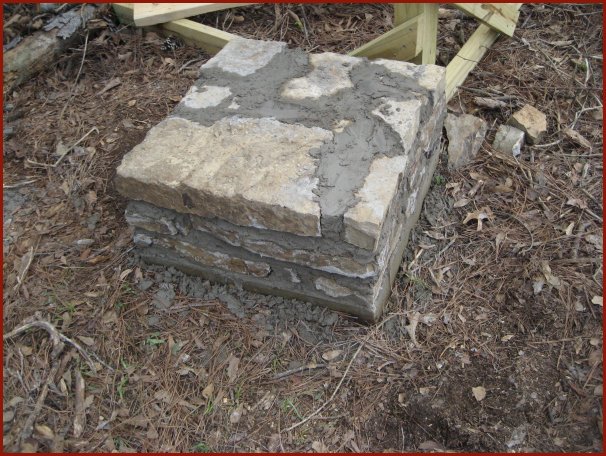 March 22, 2009
Dad and I spent the last few trips breaking rocks into 90 degree pieces for cornerstones. I actaully enjoy doing that
chore. It sorta coaxes you into being in the moment and you feel kinda connected to the rock. It can be physically
tiring and yet mentally relaxing at the same time. Zen And The Art Of Rock Breaking. LOL. Anyway, after we built up a
small stockpile of cornerstones, we mortared our first rocks into place. It actually went better than we thought it
would. After this day we mixed our mortar in a standard wheelbarrow instead of that plastic tub. The tub is too low
to the ground.
 April 1, 2009
Dad & I got quite a bit done on this day. Our first chore was to remove the old barbed wire fence on the right side of
the gate - we ended up having to tie a chain to the metal fence posts and pull them out of the ground with the Jeep.
Kinda fun actually. Each of the four columns on that side of the gate now has at least three layers of mortared rock.
We also carried the very heavy 6x6 beams to the columns. Those big beams will serve as the lower fence rails. We'll
eventually build the columns upward a couple of more feet and install one more 6x6 rail.

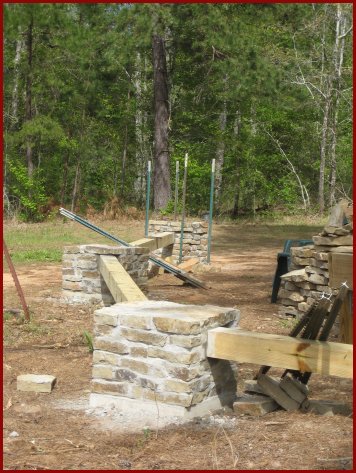 April 8, 2009
We are now about a third of the way done with the four columns on the right side of the gate. A guy working at a stone
supply store told us that to keep our columns straight we should drive some angle-iron into the ground at each corner.
Good idea, but we decided to use barbed-wire fence posts instead - because we happen to have those on hand. They work
pretty well as guides to placing the cornerstones. We probably should have done something like this earlier. Hey, it's
a learning process.
 April 11, 2009
We had several folks come out and give us a hand on the day before Easter 2009. Good times. A couple of the columns were
built high enough to install the top rail.
 April 30, 2009
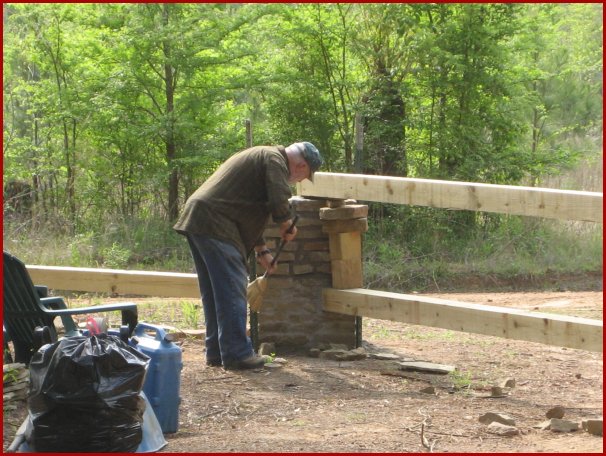
The four rock columns on the right side of the gate have been built to the desired height for the top rail. We just
need to go a couple of feet higher and those columns will be finished. Then we will begin work on the four columns on
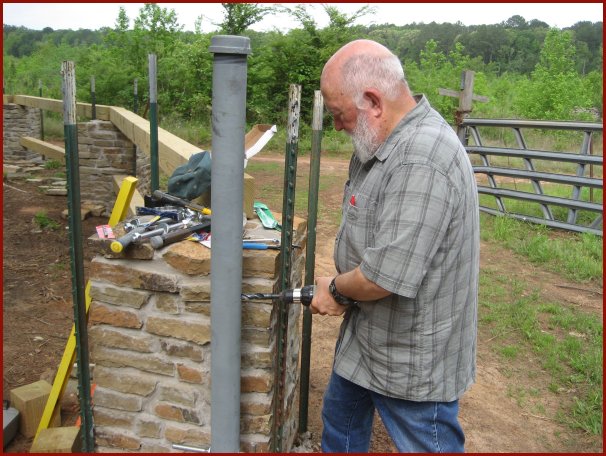
the left side of the gate. Dad had taken a solo trip just before this one and sunk a galvanized pipe vertically into
the ground and concreted it securely in place. Dad & I hung our new gate off of that pipe, instead of mounting hinges
directly onto the rock column.
Here is a video of Dad drilling holes into the pipe. He & I went
through three cordless drill batteries to complete that chore. During this trip we also removed the old galvanized
gate and we fastened the old
"Brushy Land" sign onto the new gate.
 May 16, 2009
I spent most of this trip hand-cutting (no power tools) roughly 40 cornerstones. Good corners are essential to having a
nice looking column - and we'll need over 600 cornerstones to complete the eight columns. I've become fairly efficient
at making cornerstones now. Roughly 75% of the time I can get the rock to break along the score line - often producing
two nice cornerstones. And I can nearly always hear when the rock will break with just one more hit. When the pitch of
the hammer strike gets low, the rock is about to break. Interestingly, you can stop striking the rock at that moment and
try to break it by dropping it - and the rock won't break. It's still pretty solid, yet just one more moderate blow
with the chisel along the score line will cleave the rock in two. Interesting. If a rock doesn't break the way we
want it to, we can often still use it for a side piece (i.e. between two corner stones). If the failed cornerstone
can't even be used as a side piece, then it will most likely end up as rubble inside the column.
 May 24, 2009
Dad & I added several layers of rock to two of our columns, building them up to the desired height of 5 feet (18 layers
of rock). And we placed a 26x26 inch rock "cap" on top to finish out those two columns. A few weeks prior to this trip
we had those caps specialty cut for us and delivered to the land.
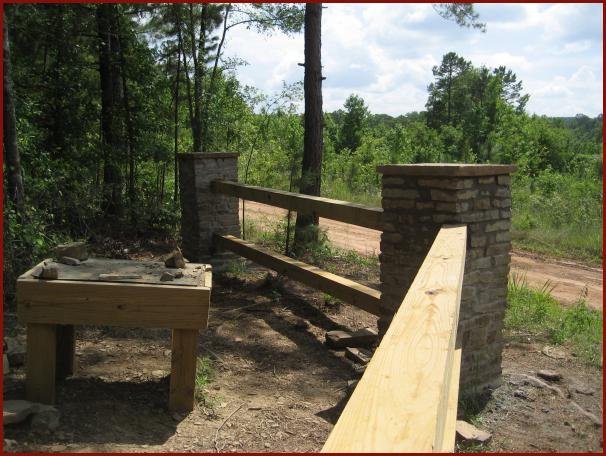
 Halfway Done!! --- June 3, 2009
Four of the eight columns have now been built! We built the column next to the gate a little more than a foot taller
than the other columns, so lifting that heavy cap rock to the top of the column was kinda tough. Dad & I stuggled a bit,
but we got it up there. Also, on an earlier outing Dad applied some sealant to the wooden beams which darkened them a
hair - we both really like the slightly darker color. Things are coming along. So now we begin building the four columns
on the left side of the gate. With the arrival of hot weather, the second half of the project will probably take longer
than the first.
Here is a short video showing what has been completed thus far.
 On Hiatus --- June 20, 2009
Due to the summer heat, we have decided to take a three month break from this adventure. We enjoy working on this
project too much to feel enervated by the scorching sun. Completion of the project can wait until Fall. To recap - we
have completed all four columns on the right side of the gate (including the rails) and we have a good start on the
four columns on the left side of the gate. All four of those columns have three layers of rock on them. I sure look
forward to getting back on this project come late September.
Here's a video of me doing one
of my favorite tasks - splitting rock.
 Work Resumes --- September 26, 2009
It's still a little warm at the land (highs often in the low 90's), but quick day trips aren't too bad. We had
several late Summer rains, so all of East Texas is green and lush - especially for late September. During this trip
(and a little on the previous weekend) Dad & I split a lot of rocks into cornerstones. I still get a kick out of that
chore.
 October 18, 2009
Dad & I have made good progress on the final four columns during the last few weeks. The Fall weather has been really
beautiful; cool days and lots of sunshine. Very nice. All of the cornerstones that we created last month (see above)
have been mortared into the final 4 columns. Note that we put the temporary blue painters tape on the beams to protect
the wood from accidental mortar spills. Speaking of mortar, we were happy with how well Muratic Acid cleaned the white
mortar off of the faces of the rock - it made the colors in the rock show up much better. We'll probably use
Muratic Acid again at the very end of the project.
 October 31, 2009
Chuck Mandernach (top picture) lent us a hand during this beautiful Fall weekend in East Texas. In the bottom picture
Dad is touching up the mortar on the first column to the left of the gate. Being one of the taller columns, getting
the heavy rock cap on it was a bit of a chore. But Dad, Chuck & I managed to get it up there. We only have eight
more layers of rock to lay down to complete the project (i.e. we have completed 144 of the 152 layers needed for all
eight columns).
 November 9, 2009
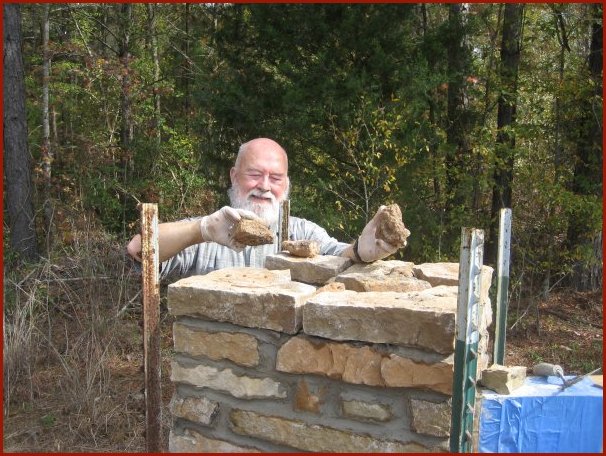
Dad is preparing a new layer on one of the columns. After we position the four cornerstones (i.e. level them
and ensure that their outside edges are 24 inches apart) we would find nice looking side pieces to fit between the
cornerstones (if there was room). Sometimes we'd use a hammer and chisel to break off a piece of stone to fit
between the cornerstones. Then we'd use locally found rock to fill in various gaps in the center of the new layer. So
a piece of Brushy Land is in each column. Then we'd squeeze mortar (with our fingertips and trowels) around all the
stones & rocks and level the mortar off on top in preparation for the next layer. We often made 6 to 9 layers in a
day, requiring 4 to 6 bags of mortar. To protect our skin, we wore surgical gloves when working with mortar.
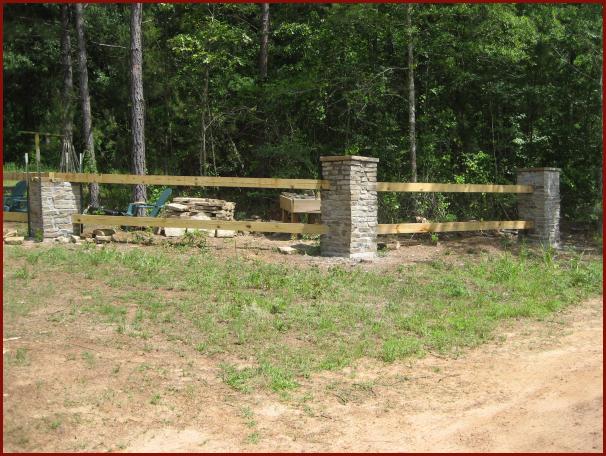
 November 9, 2009
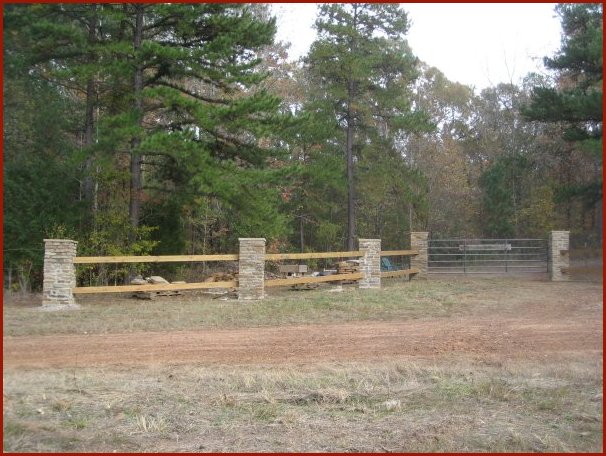
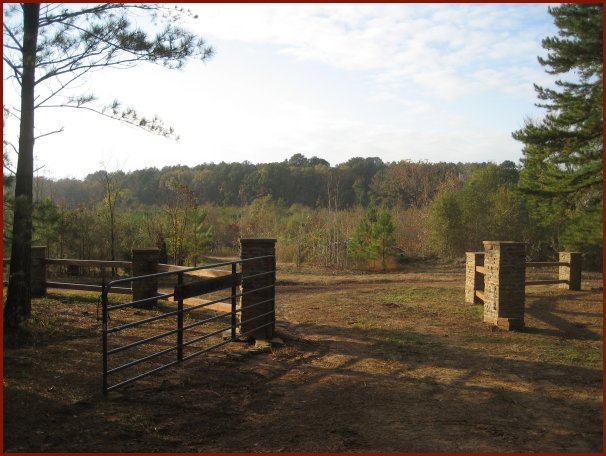
Construction of all eight columns has been completed. All we have left now is some site clean up. The above picture
shows the completed columns to the left of the gate. The four columns to the right of the gate were completed before
our Summer hiatus.
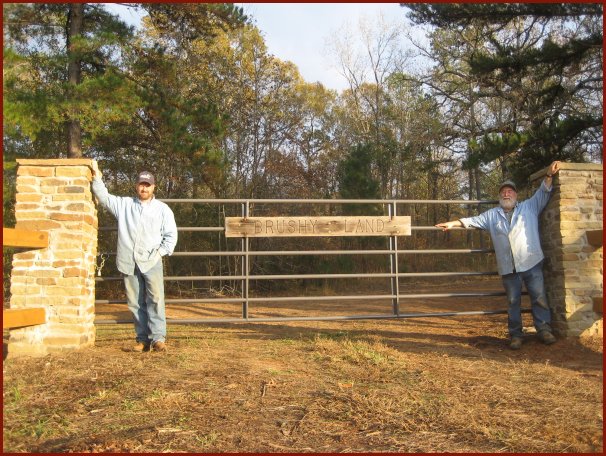 November 21, 2009 --- Finished!!
All work, including site clean up, has been completed. It was an incredibly fun & rewarding project.
Windows Media Player Video Clips
November 21, 2009 --- Finished!!
All work, including site clean up, has been completed. It was an incredibly fun & rewarding project.
Windows Media Player Video Clips
If you don't have the latest version of the Windows Media Player you can get the free version by
clicking
here.
 Having the 16-foot long 6x6's delivered - January 24, 2009
Dad practicing on a sample rock - February 21, 2009
Having the rock delivered - February 23, 2009
Dad & Chuck busting rock - February 29, 2009
Dad working a rock - March 22, 2009
Drilling hinge holes for the new gate - April 30, 2009
Halfway done with the project - June 3, 2009
Brad splitting a rock - June 17, 2009
Return to my home page
Having the 16-foot long 6x6's delivered - January 24, 2009
Dad practicing on a sample rock - February 21, 2009
Having the rock delivered - February 23, 2009
Dad & Chuck busting rock - February 29, 2009
Dad working a rock - March 22, 2009
Drilling hinge holes for the new gate - April 30, 2009
Halfway done with the project - June 3, 2009
Brad splitting a rock - June 17, 2009
Return to my home page